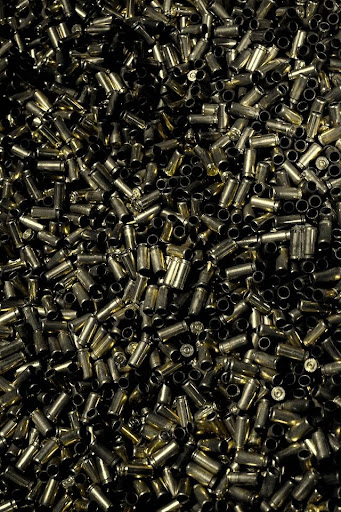
Ever wondered about rolling up your sleeves and diving into the world of reloading with once-fired brass? It’s like crafting your own tailor-made bullets – an exciting journey for sure. Whether you’re a seasoned shooter looking to save some bucks or a curious newbie, reloading your own ammo is a hands-on experience that’s both rewarding and practical.
To give you an idea, here is a walk through of the steps of reloading with once-fired brass, step by step.
Get Familiar with Once-Fired Brass
Let’s start by getting acquainted with once-fired brass.
Imagine this:
you’ve shot a round, and now you’ve got an empty brass casing that’s been used once. That’s what we mean by “once-fired” brass. You can collect these casings from your own shooting sessions or even pick them up from shooting ranges or online shops. You can easily use rare earth magnets to make things easier.
Why consider using once fired 9mm brass regularly? Well, it’s a thrifty choice – reusing casings saves money compared to always buying new ones. Plus, it’s an environmentally friendly option, giving a second life to materials that would otherwise go to waste. Just remember, give those casings a quick check for any visible damage before you start reloading.
Gather Your Tools
Now that you’re up to speed on once-fired brass, let’s gather the essential tools you’ll need:
Reloading Press: Think of it as your ammo crafting station – where the magic happens.
Dies: These tools shape and resize the brass casings for reuse.
Powder Scale: A must-have for measuring the right amount of gunpowder.
Calipers: These helps measure the length of your ammo for consistency.
Priming Tool: This tool inserts fresh primers into the casings.
Powder Funnel: It makes pouring gunpowder into the casings a breeze.
Once-Fired Brass (of course!)
Bullets: The actual projectiles that you’ll be shooting.
Powder and Primers: The ingredients that make your bullets go “bang.”
The Reloading
Let’s roll up our sleeves and dive into the reloading process:
Cleaning the Brass: Start by cleaning those once-fired casings. A tumbler with some media will get rid of dirt and grime.
Inspect and Resize: Examine each casing for any signs of damage and use the dies to resize them if needed.
Adding Primers: Use the priming tool to insert fresh primers into the casings.
Measuring and Adding Gunpowder: The powder scale helps you measure the right amount of gunpowder, and the powder funnel makes adding it to the casings easy.
Placing Bullets: Put a bullet on top of each casing and use the reloading press to secure it in place.
Crimping (if necessary): Depending on your firearm, you might need to apply a slight crimp to hold the bullet securely.
Double-Check Everything: Before moving on, double-check your measurements and the components.
Prioritize Safety
Safety is key when reloading. Here’s how to stay safe:
Wear Safety Glasses: Protect your eyes while working with brass and gunpowder.
Work in a well-ventilated area to avoid inhaling any fumes.
Consult Reliable Sources: Use loading manuals or trusted online resources for accurate load data.
Start Slow: Begin with the minimum recommended gunpowder amount and work your way up.
Proper Storage: Store primers, gunpowder, and your reloaded ammo in a cool, dry place away from direct sunlight.
Keep Records
As you get more comfortable with reloading, keep track of your progress. Note down the details of each batch, like brass type, bullet weight, and gunpowder amount. This helps you replicate successful loads and troubleshoot any issues.


