

How to Draw Barbed Wire. Barbed wire is something you commonly see and won’t think twice about. Barbed wire performs a simple but important function, yet it is often taken for granted.
Also, check our cat coloring pages printable on our Official Website, The Soft Roots.
While it serves a simple function, barbed wire’s structure is surprisingly intricate and complex, making learning how to draw it difficult to Draw Barbed Wire.
Luckily, it can be a lot easier if you break it down into steps, which is what this guide is designed for!
How to Draw Barbed Wire
Step 1
In this first step of our barbed wire drawing guide, we’ll draw some curved lines that don’t seem like much at first glance but will later form an important part of the drawing.
For this step, you should refer heavily to the reference image as you draw because what we’re drawing now will interact with future steps in specific ways.
Consider drawing it with a pencil and then going over it with a pen once you’re happy with how it looks. Once you’ve marked the stripes as they appear in the contact image, you’re ready for the next phase to Draw Barbed Wire!
Step 2
It’s no secret that barbed wire is made from coiled wires, as the name suggests, and with the lines, we draw in this part of your barbed wire drawing, we will add more wire.
These lines are similar to the ones from the previous step and interact in a specific way to look like winding wires.
Once satisfied with its formation, you’re ready for step three to Draw Barbed Wire!
Step 3
The barbed wire would only be very useful with some spikes, so in this part of our barbed wire drawing guide, we’ll start by drawing them.
To do this, use some hard, angular lines ending in sharp points for the tips. The lines also curve so that they appear to twist together.
This pointy part needs to be clarified, but it’s easier than you think if you take it slow and follow the reference image closely to Draw Barbed Wire.
Step 4
You’re doing a great job with this barbed wire design so far! You’ve come to this point, so you should be fine following the rest of this guide.
We will add more lines to the wires and tips in this part. Use a few more wavy lines for the horizontal strand like you’ve been doing so far.
Next, we’ll add two more spikes. This set of spikes looks different from what you drew in the previous step.
However, we will add more in the next step. So once you’re happy with how it looks, step 5 lets you finalize some detailsto Draw Barbed Wire!
Step 5
It’s almost time to add some colors to your drawing in this barbed wire drawing guide, but first, we need to add some final details.
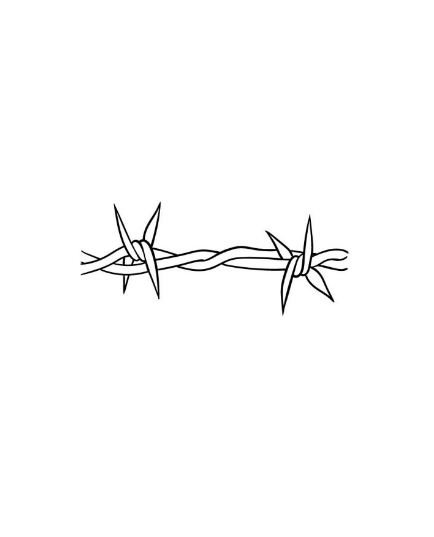
As mentioned in the last step, we’ll finish the group of spikes you started in part 4. With a few more curved lines ending in sharp points, you can finish off the twisted wires and sharp protrusions of barbed wire.
If you’ve added these final details and tips, you’ve finished all the details for this image! Before proceeding, add some personal information.
You could draw several rows of barbed wire under that row or draw an imposing shield under the wire to show what it’s protecting.
Step 6
This brings you to the final phase of your barbed wire drawing. In this step, you’ll add some colors to your image to complement it.
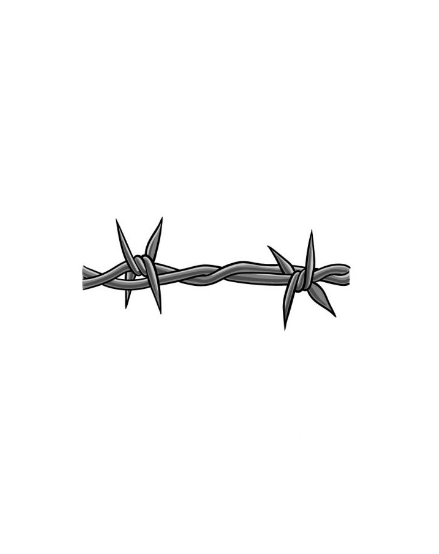
In our reference image, we used some variations of different shades of gray to give the wire a metallic look to Draw Barbed Wire.
This can serve as a reference point if you want a similar look for your image, but there are many ways you can bring your favorite colors into this image.
If you’ve drawn a scene or counted details, this is a great way to add better color to that picture.
You can also opt for a more stylistic look and use bright and vibrant shades to complement it.
Your Barbed Wire Drawing is Finished!


